Wednesday, June 1, 2016

Tea, Anyone?

It's funny, isn't it, that life will roll, boringly, along when, BAM!suddenly you don't have a free minute. My life is normally filled with quiet nights at home, watching TV and playing on the internet. The past few weeks have been different. Very different. I have barely had time to sit down, much less do any cooking.

I was asked to help with a Ladies Tea at church, which happened last Saturday. It was a lovely event, if small, and very well received. We had various types of finger sandwiches, an assortment of teas, and an assortment of cookies.

I made Lemon Coolers. Much like the little cookies made by Sunshine in my youth.

 photo 2fd81df7-6c62-45be-a5f4-0297b2aa6533_zpsmnw5ke3j.jpg

Lemon Coolers

1/2 cup powdered sugar
1/3 cup sugar
1/3 cup shortening (I used butter)
1 egg
1/2 teaspoon vanilla
1/8 teaspoon salt
1 1/2 cups cake flour
1 1/2 teaspoons baking powder
1 tablespoon water (next time, I will use fresh lemon juice instead of water)
(I also added 1 teaspoon of lemon zest to the dough)

Lemon Powdered Sugar
1 cup powdered sugar
rounded 1/2 teaspoon unsweetened Kool-Aid lemonade drink mix (next time, I will try 1 teaspoon grated lemon zest)

Preheat oven to 325 degrees.

Cream together sugars, butter, egg, vanilla, and salt in a large bowl. Add the flour, baking powder and 1 teaspoon of lemon zest. Add 1 tablespoon of water (or lemon juice) and continue mixing until dough forms a ball.

Roll dough into 3/4-inch balls and flatten slightly onto a lightly greased cookie sheet (I used parchment-lined baking sheets). Bake for 15 to 18 minutes or until cookies are light brown.

As cookies bake, combine 1 cup powdered sugar with the lemonade drink mix (or 1 teaspoon of lemon zest, or both) in a large plastic bag and shake thoroughly to mix. When the cookies are removed from the oven and while they are hot, add 4 or 5at a time to the bag and shake it until the cookies are well coated. Repeat with the remaining cookies. Makes 4 dozen.

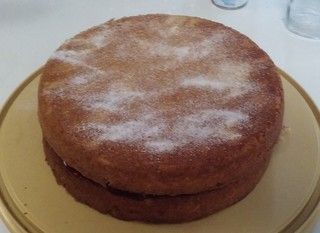
I also made a Victoria Sponge Sandwich cake using Mary Berry's recipe, which you can find here

 photo 20160528_100205_zpstemylxdw.jpg
They were both perfect for tea.

Saturday, April 23, 2016

Tears In My Muffins

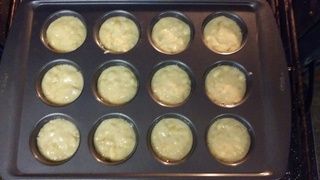
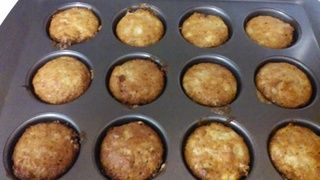
I walked into the kitchen this morning and noticed that my bananas were as brown as they were yellow and decided that I needed to do something with them. I pulled out an old favorite recipe and began mixing, mashing, and stirring. I suddenly remembered the last time I used this recipe and was brought up short. It was a day as beautiful a today 3 1/2 years ago. October 10, 2012, the day my mother died. As we sat beside her, watching her fight to hold on to life, I grew restless and went into the kitchen in search of something to do. My cousin Beth joined me, sitting at the bar, drinking a Coke and talking to me while I worked. And as I remembered the day, waves of grief and sorrow washed over me, leaving me gasping for breath, holding onto the kitchen counter for dear life.

I managed to finish the batter and get the muffins in the oven between bouts of tears. I had not experienced this depth of emotion in a long time. I was once again serving banana muffins to the friends and family sitting there with us--Dad, my sister, her husband, their daughter, Mom's pastor, Beth, and the hospice nurse. I felt much like the Biblical Martha, doing the practical, playing the hostess. It was my comfort zone.

 photo 20160423_121752_zps5ojtpoby.jpg

The smell from the oven, so marvelously warm and wonderful, made me sad. I remembered the fact that Beth is no longer with us and wept again. I remembered that Mom's dear sister, my Aunt Rachel, had come to visit Mom the week before and the joy on Mom's face was beatific. Now, Aunt Rachel is also gone and, once again, swells of melancholy rocked me.

 photo 20160423_124644_zpsvml2lokz.jpg

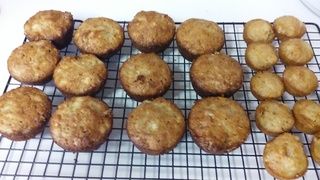
I took the muffins from the oven; it took me a long time to try one, but when I did, it was delicious. Slowly, the pain inside me eased and I started to smile, remembered the happy times with Mom, including the first time that she made these muffins. Mom loved to cook, loved to try new recipes. She loved to laugh. And like me, she had a Martha mentality. She would never be your shoulder to cry on, but she would bake you a cake or clean your house in times of need. I loved that woman!

If it is true that the emotions of the cook are in the food, these muffins will taste of love and loss and grief and joy.

 photo 20160423_130241_zpsijlk5xl7.jpg

Banana Muffins

1/2 cup room temperature butter
1 cup sugar
2 eggs lightly beaten
3 bananas
1 1/4 cup all purpose flour
1/2 tsp baking soda

Preheat oven to 350 degrees. Mix together flour and baking soda.
Cream butter and sugar until smooth and fluffy. Add eggs and mix well; stir in mashed bananas. Add flour mixture and stir until moist--do not over-mix.
Fill muffin pans 3/4 full. Bake approx 25 minutes.


Sunday, April 10, 2016

Never, Ever From A Box

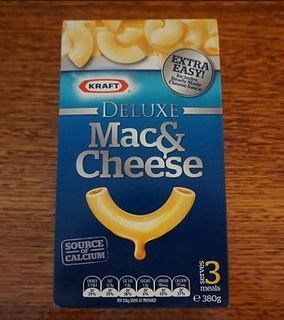
If you had asked me as a child or young adult if I liked macaroni and cheese, I would have said no. My mother, like so many working mothers, used that blue box.

 photo bluebox_zpsld8ggztd.jpg

I am a cheese freak, and I never felt that the box stuff was cheesy enough.

When I was in my twenties, I discovered Velveeta Shells and Cheese. It was cheesy enough and pretty good. Anyone who turns up their nose at Velveeta is a poser. It has a place in American food history, if for nothing more than queso dip. It is wonderfully delicious chemical concoction that makes parties special.

 photo shellsandcheese_zpsgxce7vko.jpg

I experienced a total revelation the first time I had homemade mac and cheese. It had a custard base made with evaporated milk and bread crumbs on top. It was wonderful, but lacked the smooth cheesiness I craved. The cheese was not evenly distributed throughout the dish.

One day I stumbled upon a recipe from Southern Living that began with a bechamel and became a luscious cheese sauce poured over elbow macaroni before being topped with more cheese and baked.

Classic Baked Mac and Cheese

1 (8oz) box elbow macaroni
2 Tbsp. butter
2 Tbsp. flour (all purpose)
2 cups milk
1/2 tsp. salt
1/2 tsp. pepper
1/4 tsp. ground red pepper
1 (8oz) block SHARP cheddar cheese divided.

Prepare the pasta and keep warm.

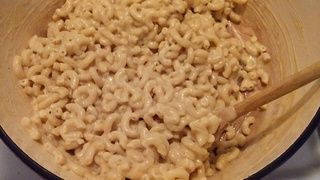
Melt butter in a large saucepan or Dutch oven over medium low heat: whisk in the flour until smooth. Cook, whisking constantly, 2 minutes until thick. *Gradually whisk in the milk and cook whisking constantly, 5 minutes or until thickened. Remove from the heat and whisk in the salt and peppers then add one cup of shredded cheese and stir or whisk until melted. It becomes thick (slightly) and creamy. Add to the cooked pasta and mix together.

 photo 20160410_104833_zpsanrsxiue.jpg

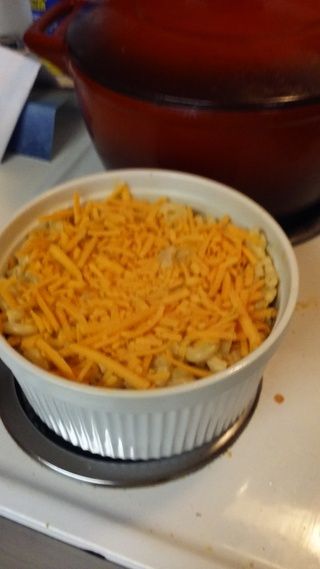
Spoon pasta mixture into a lightly greased 2 quart baking dish and top with remaining cheese.

 photo 20160410_110349_zpsji5li0oh.jpg

Bake at 400 degrees for 20 minutes or until bubbly (I think mine was bubbly after 15 minutes then I turned off the oven and let it sit for another 5). Let it stand for 5-10 minutes before serving.

*Raise the temperature to medium/medium high.

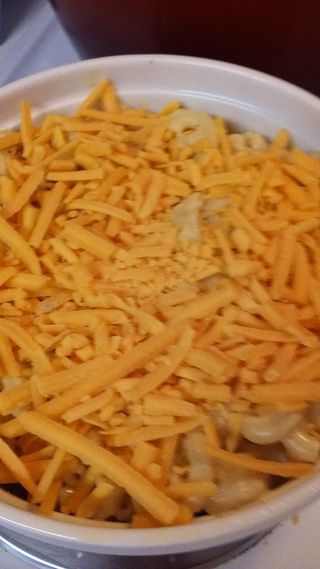
A little more food porn?

 photo 20160410_110340_zpsahzlckty.jpg

This has become my go-to recipe. While making it today, I had a bit of inspiration, so don't be surprised if a variation of this recipe shows up some time in the future.


Saturday, March 26, 2016

Meyer Lemon Tart

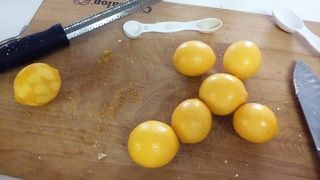
On a recent trip to Trader Joe's, I picked up a bag of Meyer Lemons. They sat in the fridge, waiting patiently to be used, but I had neither the time nor desire to work with them until today. A day off. A day off with nothing else to do. No shopping, no meetings, nothing. So I pulled up Martha Stewart's recipe recipe for a tart.

 photo 20160326_124711_zps4qr6q30h.jpg

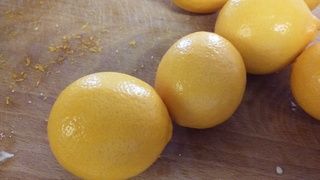
If you've never had a Meyer lemon, they are a cross between a mandarin and a lemon, and the filling is much milder and sweeter than a typical lemon curd. It's hard to tell from these photos, but the color is a golden yellow, much different from a plain lemon.

 photo 20160326_124716_zps6z5eo0vg.jpg

The crust is good enough to eat alone. Seriously, it's that good!

FOR THE CRUST
1 cup all-purpose flour
2 tablespoons sugar
Salt
1/4 teaspoon finely grated Meyer lemon zest
1 stick cold unsalted butter, cut into pieces
1/2 teaspoon pure vanilla extract

Make the crust: Whisk together flour, sugar, 1/2 teaspoon salt, and the lemon zest in a large bowl. Cut in butter with a pastry cutter or your fingers until dough begins to hold together.
Stir together 1 tablespoon water and vanilla, then mix into dough. Shape dough into a disk, and wrap in plastic wrap. Refrigerate for 30 minutes.
Using your fingers, press dough evenly into bottom and up sides of a 9-inch* fluted tart pan with a removable bottom. Freeze for 30 minutes. Preheat oven to 375 degrees and bake until golden, about 25 minutes. Let cool completely.

FOR THE LEMON CURD
2 large eggs plus 3 large egg yolks
1/4 cup plus 2 tablespoons sugar
1/4 teaspoon cornstarch
3 tablespoons finely grated Meyer lemon zest, plus 1/3 cup fresh Meyer lemon juice (from 3 lemons)
6 tablespoons unsalted butter, cut into small pieces

Make the lemon curd: Whisk together eggs, egg yolks, sugar, and cornstarch in a medium saucepan. Whisk in lemon zest and juice. Cook over medium-low heat, stirring constantly, until thick enough to coat the back of a wooden spoon, about 7 minutes. Remove from heat and whisk in butter, 1 piece at a time.
Pour filling into cooled tart shell. Bake until filling is browned, slightly puffed, and set, about 30 minutes. Let cool completely.**

*I only have a 10" tart pan, so I increased the crust by 1/4.
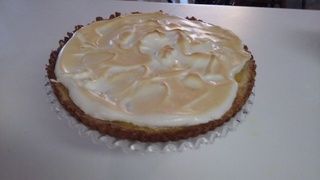
**I didn't let it get brown on top, but instead used the discarded egg whites to make a meringue. I spread it on top of the cooled tart and then ut it under the broiler until the meringue was a perfect shade light brown.

 photo 20160326_165722_zpsbpptaz3m.jpg

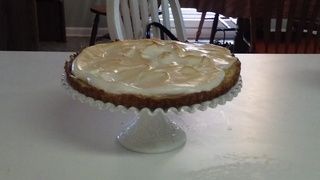
And the final product....

 photo 20160326_165756_zpsguhxt2k1.jpg


Tuesday, March 8, 2016

Bolognese

I always wanted to make a true bolognese. I found Martha Stewart's recipe and bought the ingredients. I got a knife sharpener for Christmas and it made my knives a pleasure to work with.
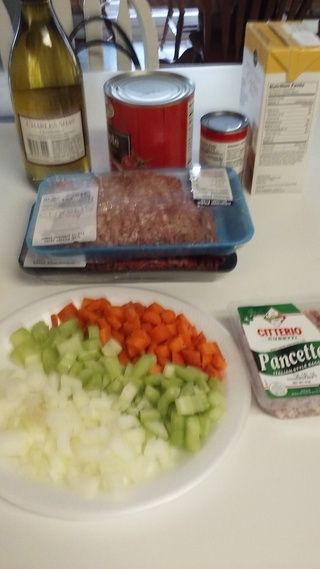
 photo 20160307_072756_zpszh7qzlew.jpg

Just look at that mise en place!

Here is the recipe I used:

FOR SOFFRITO
2 tablespoons unsalted butter
2 tablespoons extra-virgin olive oil
3 ounces pancetta, cut into 1/4-inch pieces (2/3 cup)
2/3 cup minced yellow onion (1/2 medium)
2/3 cup minced carrot (2 medium)
2/3 cup minced celery (1 rib)
FOR SAUCE
1 pound ground beef, such as chuck or sirloin
1 pound ground pork
3 tablespoons plus 1 teaspoon tomato paste
1 cup dry white wine
1 1/4 cups whole milk
5 sprigs thyme, tied into a bundle with kitchen twine
1 to 2 fresh bay leaves
1 can (28 ounces) whole peeled tomatoes, pureed (with juice) in a blender (or through a food mill)
6 to 7 cups Basic Chicken Stock
Coarse salt and freshly ground pepper
DIRECTIONS

Heat butter and oil in a large pot over medium-high heat until butter starts to sizzle, then reduce heat to medium. Add pancetta, and cook until golden and fat has rendered, about 2 1/2 minutes. Add onion, carrot, and celery, and cook, stirring often, until just beginning to brown around edges, about 10 minutes (adjust heat if mixture is browning too quickly).
Add beef and pork and cook over medium heat, stirring frequently and separating meat with the back of a wooden spoon, until no longer pink, 8 to 10 minutes. Once meat is completely browned, pour off any excess fat. Add tomato paste and cook 1 minute, stirring to intensify sweetness.
Pour in wine and cook, stirring to scrape up browned bits from bottom of pot, until liquid has evaporated, 6 to 7 minutes. Add 1 cup milk and cook until reduced by half, about 3 minutes (don't worry if it appears slightly curdled, it will smooth out again). Add thyme bundle and bay leaves, and then pour in tomatoes and 6 cups stock. Season with 1
Bring to a boil, then reduce heat to a very low simmer and cook, partially covered, 3 to 3 1/2 hours, skimming the fat from the surface with a ladle periodically. If at any time the sauce appears too dry, add up to 1 cup more stock as necessary. The finished sauce should have the consistency of a loose chili. Stir in remaining 1/4 cup milk and season with salt and pepper, as desired. If not serving immediately, let cool completely before transferring to airtight containers. Refrigerate up to 3 days or freeze up to 3 months; defrost in the refrigerator before using.

This is Mario Batali's recipe:

6 Ragu Bolognese Recipe by Mario Batali ­
RAGU OLOGNS
For the Meat Sauce:
1/4 cup xtra Virgin Olive Oil
2 talepoon utter
2 medium Onion (finel chopped)
4 ri Celer (finel chopped)
2 Carrot (finel chopped)
5 Garlic clove (liced)
1 pound ground Pork
1 pound ground Veal
4 ounce Pancetta or Sla acon (run
through the medium hole of the
utcher' grinder)
1 ; 4 1/2-ounce tue of Tomato Pate
1 cup Whole Milk
1 cup Dr White Wine
1/2 cup Parle (leave picked and
chopped)
For the Pata:
Salt
1 1/2 pound Freh Taglietelle
1/2 cup frehl grated ParmigianoReggiano
(plu more for garnih)


1 For the Meat Sauce:
2 In a 6- to 8-quart heav-ottomed pot, heat the olive oil and utter over medium heat until melted.
Add the onion, celer, carrot, and garlic, eaon with alt, and cook until the vegetale are tranlucent ut not rowned,
aout 5 to 7 minute.
3
Add the veal, pork, and pancetta, increae the heat to high and rown the meat, tirring frequentl. Cook for 10 to 15 minute,
or until the meat i dark rown and the fat ha rendered out completel. There will e a hallow pool of fat in the pan. Thi i
deirale.
4
3/8/2016 Ragu Bolognese Recipe by Mario Batali ­ The Chew
http://abc.go.com/shows/the­chew/recipes/ragu­bolognese­mario­batali 2/2
Similar categorie: Ingredient, Pata, Coure & Meal, Dinner, Pizza & Pata, Cuiine,
Italian
Add the tomato pate and cook it in the fat for 2 to 3 minute, or until the color i rut orange. Add the milk and cook until
almot completel reduced.
5
Add the wine and ring jut to a oil, then reduce the heat to medium-low and immer for 2 to 3 hour. Seaon the ragu with
alt, remove from the heat, and let cool.
6
7 Sauce can e tored in an airtight container for 1 week in the fridge or frozen for up to 6 month.
8 For the Pata:
To erve, ring a large pot of alted water to a oil. Cook pata 1 minute hort of the packaged intruction. Drain, reerving
pata water for auce.
9
In a large aute pan heat aout 1 1/2 to 2 cup of auce over medium. Add the cooked pata and aout a 1/2 cup of reerved
pata water. Stir to coat pata.
10
11 Add 1/2 cup of Parmigiano and 4 talepoon of olive oil. Stir until cream. To in the chopped parle.
12 Serve and garnih each plate with a generou amount of frehl grated Parmigiano-Reggiano.

Can you see a difference? I kept thinking that it could use garlic. And perhaps the 6 to 7 cups of chicken stock?!

The sauce was bland and watery
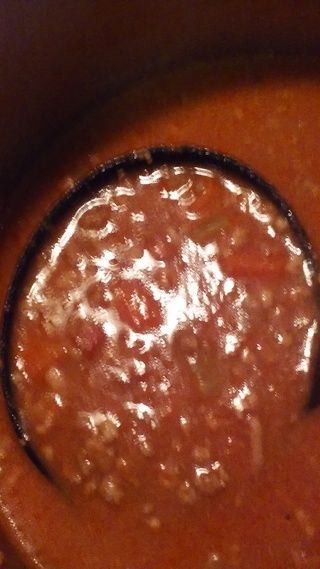
 photo 20160308_181858_zpsts3pyswz.jpg

and I have a couple of quarts in the freezer.

I think that I will add some tomato paste and garlic to it when I heat it up, but next time, I will try Mario Batali's recipe.

Wednesday, February 10, 2016

Valentine Sweets

I decided to make heart shaped marshmallows for my Secret Pal for Valentine's Day but could not find my heart shaped cookie cutter, so I went to Walmart early yesterday morning. While there, I remembered that I needed gelatin, which took me into the baking department and I had a sudden urge to make truffles.

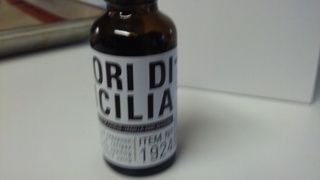
My friend Karen had given me some Fiori Di Sicilia for Christmas and I decided to use it in the truffles. The combination of citrus and vanilla with the deep chocolate was lovely and reminded me of Terry's Chocolate Orange. I adapted a Pioneer Woman recipe for the truffles to intensify the chocolate flavor.

 photo 20160209_140451_zps2o2587ki.jpg

Chocolate Truffles with Fiori Di Sicilia

10 oz 60% cacao chocolate
6 oz semi-sweet chocolate
1 can sweetened condensed milk
1/4 tsp Fiori Di Sicilia
8 ox light chocolate melts
Sea salt


Place chocolate in double boiler over simmering water. As it starts to melt, add evaporated milk and blend until the consistency of marshmallow cream. Remove from heat and add Fiori Di Sicilia. Refrigerate for a minimum of 2 hour but up to 24. Roll into balls and place on a wax paper lined baking sheet. Place in the freezer for a minimum of 20 minutes. Melt chocolate and dip balls. Place on baking sheet and refrigerate.

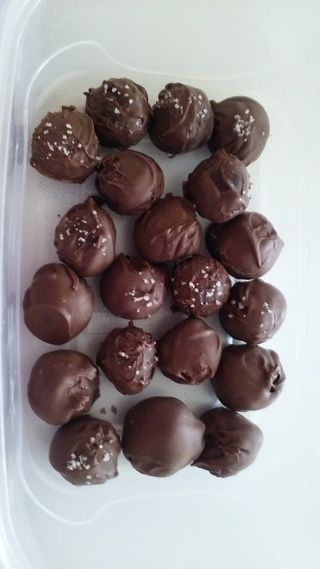
 photo 20160210_101702_zps2qydfht7.jpg

I sprinkled sea salt on half the recipe while the coating was still liquid.

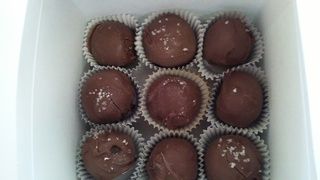
 photo 20160210_101814_zps5rq7uzgi.jpg

 photo 20160210_101913_zps0ntqoj1q.jpg

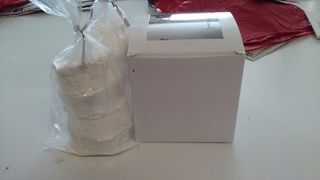
Packed and ready to go!

Wednesday, February 3, 2016

Drink A Bite to Eat at 10, 2, or 4

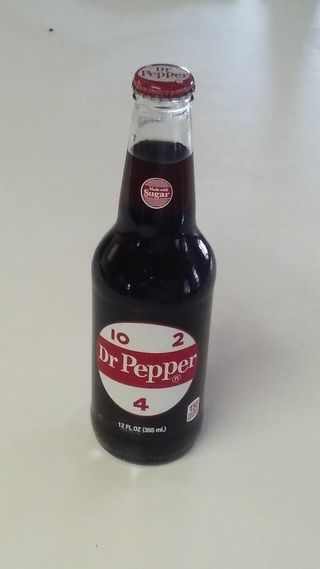
Anyone who knows me knows that I love Diet Dr. Pepper. I have reached a point in life, however, when I cannot drink it every day. But, at Christmas, I receive a bucket of my favorite beverage...cans and bottles in all sizes, and in the bottom was a four pack of old style glass bottles of regular Dr. Pepper.

 photo 20160203_135146_zps8mvdz8jq.jpg

I pondered this for a while. I used one bottle to braise a pot roast. And then, I found a recipe for Dr. Pepper Cake.

Dr Pepper Cake
Ingredients
for the cake:
1½ cup Dr. Pepper soda
½ cup vegetable or canola oil
1 stick unsalted butter (8 tablespoons)
4 tablespoons cocoa powder
1¼ cups sugar
2 cups flour
1 teaspoon baking soda
2 eggs
½ cup buttermilk
For the Chocolate Topping
4 tablespoons unsalted butter
2 tablespoons cocoa powder
4 tablespoons milk
2 cups powdered sugar
Instructions
Cake:
preheat oven to 350F and grease a 13x9 baking pan.
combine the dr pepper, oil, butter, and cocoa powder in a saucepan over medium heat. bring to a simmer, mix well, and remove from heat.
add sugar, flour, and baking soda to the pan and mix well.
in a separate bowl, beat the eggs and buttermilk together. add a small amount of the hot batter to the egg mixture (a couple tablespoons) and mix well. then add the egg mixture to the batter and mix well.
pour into greased pan and bake for 25 minutes, or until a toothpick comes out clean.
while the cake is cooling, make the glaze.
Topping:
combine the butter, cocoa powder, and milk together in a saucepan over medium heat.
when the butter is melted and the mixture is combined, whisk in the sugar, ½ cup at a time, until fully incorporated and smooth.
pour over the warm cake.

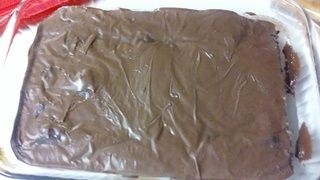
A couple of observations: 1)the process is much the same as other chocolate cakes I've made before, but the batter is thicker than I expected and 2)you can taste the Dr. Pepper!

Also, the frosting took more milk...but that could have been my fault.

 photo 20160203_174740_zpsgo6hjvou.jpg

When all is said and done, it's a very moist, delicious chocolate cake.